Monday, August 15, 2016

Baked Sliders

Hey there! Let's talk about the sliders I made because they were quite yummy. I was inspired by a Tasty video I saw on Facebook. In the video they made sliders four ways using dinner rolls. Now, I know many of you have made or had sliders but consider trying this method. It's all fairly straightforward. Disclaimer: This is not the healthiest dish BUT this can be great for your next potluck or when you invite people over.

1. Preheat oven to 350 degrees.

2. Slice a pack of dinner rolls in the middle. Where you would normally cut each roll individually, cut the middle of several rolls as if all the rolls are one loaf (see picture). I used jalapeño Hawaiian sweet rolls (highly recommend). Put the bottom half of the dinner rolls in a Pyrex dish or a baking dish deep enough to bake the rolls in (see picture).

3. Fillings!! I used some veggie grounds but you can use any cooked meat (ground beef, shredded chicken, etc). Get your favorite sliced cheese (I used Havarti) and layer that on the bottom half of the rolls first. Then layer your cooked meat. I added some diced tomatoes on top of the veggie ground (meat) and then the top layer of bread. You can be as creative as you want (ex. onions, spinach, BBQ sauce). If you want to add an extra layer of flavor, spread some melted butter on the top layer of dinner rolls. Feeling extra bold (depending on the flavor profile your going for) mix parmesan or sesame seeds with the butter. Basically treat these like mini hamburgers.

4. Baked for 20 minutes.

Add that's it!! Cut out the pieces you want from the baked sliders.

Football season is coming, so I expect someone to let me know they made these ;)

Salud!

Wednesday, August 10, 2016

Do the Math!

So, I was out on a date (yes, a date) recently and we started talking about cooking. Naturally we talked about what we like to prepare. The conversation eventually led to us talking about meal prep. I talked about preparing all my meals for the week and he asked if I actually saved money doing that. I pulled out a little notebook from my purse and suggested we do the math. I asked him what he would honestly spend on breakfast, lunch, and dinner per day if he ate out or picked up food. We added up the numbers and he sat back in the chair. He then asked how much I spend on food and I said $40-60 total for the week. He said the convo got him thinking.

With that, have you done the math? Not saying you can't pick up a meal here and there but how much do you spend a week eating out? What would you do with a little more wiggle room in your budget? Take your favorite meal prep blogger on a vacation in the Caribbean? (Wink)

Just some food for thought!

Salud!

Tuesday, June 28, 2016

The Pescatarian Life

Hey there! I'm still living and enjoying the pescatarian life! It's not always easy, especially when you get the side eye for not eating chicken. But I'm enjoying the positive outcomes from choosing this lifestyle so I'm going to stick with it as long as I feel like it. I actually did this once before when I was in grad school for almost a year. Right now, I'm at 3.5 months.
A few of you have asked about my shrimp, red pepper, and potatoes packet. That was one of the easiest things that I have ever made. I took some frozen shrimp (I have fallen in love with the Trader Joe's brand pictured). Then I just cut up some red peppers and potatoes, seasoned everything with a little pink sea salt and pepper, and drizzled some olive oil over everything. I added just a little Earth Balance (you can add butter if you like) to the potatoes. Baked in the oven at 425 for a few minutes and then voila! 

Here's a more precise breakdown:

Ingredients
  • 1 1/2 pounds large shrimp, peeled, deveined and tail off (Can be frozen or fresh shrimp, at least medium size)
  • 1 pound baby red potatoes, cut into thin slices
  • 2-3 tablespoons olive oil
  • Sea salt and freshly ground black pepper, to taste
  • 2 tablespoons chopped fresh parsley leaves (optional)
Instructions
  • Preheat the oven to 425 degrees
  • Cut four sheets of foil, about 12-inches long. Divide shrimp and potatoes into 4 equal portions and add to the center of each foil in a single layer. (Note: In the picture it is all in one piece of foil, I don't recommend that)
  • Fold up all 4 sides of each foil packet. Add olive oil, salt and pepper, to taste; gently toss to combine. Fold the sides of the foil over the shrimp, covering completely and sealing the packets closed.
  • Place foil packets on a baking sheet lined with foil and cook until just cooked through, about 15-17 minutes.*
  • Served immediately, garnished with parsley, if desired.
Notes
*This can also be cooked on a gas grill
*You can add sausage and corn to the mix as well

This meal took no time to prep! It can definitely be good quick meal for a large group of people. 

That's it from me! Remember I'm taking requests for recipes and just general questions. 

Salud!

Thursday, June 16, 2016

Reader's Request!!!

Hey there!!! Hope you're well!! Things have been non-stop on my end but I wouldn't have it any other way. I thought about writing about my roasted veggie medley (see picture) because that's been my go-to lately, but I REALLY want to hear from my readers. What are you interested in learning how to make? Need a recipe revamp? Talk to me ;)

So email me at singlesistasdish@gmail.com and tell me what you want me to write about or prepare.

Until next time........Salud!!!!!

Friday, June 3, 2016

Baked Egg Rolls

Hey loves! I'm still basking in the glow of the past week. I spent time in San Francisco and Oakland with over 100 of my Batala brothers and sisters. We performed in San Francisco's Carnaval, walked the Golden Gate Bridge, went on a tour of Oakland lead by the first Black woman in the Black Panther Party, partied on a boat, ate lots of burritos, learned Afro-Brazilian dances, and of course did a lot of drumming. I returned a little exhausted, sunburned, and jet lagged but definitely full of awesome memories. Can't wait until next year!

So, I have been craving egg rolls. Not sure why but that's what I have a taste for lately. Since it's Friday and it's a night people typically like to eat out, I thought I would share my recipe. I bake them and definitely don't miss the fried ones from the take out joints.

Ingredients
  • Coconut oil or olive oil cooking spray 
  • 1-12 oz package of raw (no dressings, etc) broccoli slaw (contains shredded broccoli and carrots)
  • 1 small yellow onion, diced
  • 1 clove garlic, minced
  • 2 teaspoon ginger paste
  • 1 scallion, thinly sliced
  • 2-3 cups chopped cooked shrimp (I like a lot of shrimp in mine)
  • 1 tablespoon low sodium soy sauce or tamari
  • Kosher salt and freshly ground black pepper
  • 16 egg roll wrappers


Instructions
  1. Preheat the oven to 400ºF. Lightly spray a baking sheet with cooking spray.
  2. In a large pan, heat coconut or olive oil over medium heat. Once hot, add the broccoli slaw, onion, and carrot and cook until softened and translucent, about 7 minutes. Add the garlic, ginger, scallion, shrimp and soy sauce. Cook another 2 minutes and remove from the heat. Season with salt and pepper to taste.
  3. To assemble the egg rolls, lay one egg roll wrapper out in front of you in a diamond shape (see picture to the right). Spoon about 1.5 - 2 tablespoons into the center of the wrapper. Fold up the bottom corner, tucking it in tightly around the filling, then fold in the sides. With your finger, dab a small amount of water on the top corner and the sides of the wrapper and roll the whole thing up to seal. Place egg rolls seam side down on the prepared baking sheet. Spray the egg rolls with coconut or olive oil.
  4. Bake egg rolls in the oven for 30 minutes, flipping the egg roll to the other side after 15 minutes.
Pair this with some quick stir fry and Netflix and you are all set for tonight!

You can freeze the egg rolls once they are cool in a freezer container, separating layers with waxed paper. Reheat them in the oven at 350ºF for 8-10 minutes and they come out really crispy and tasty! 

I'll "see" you all next week! Have a good weekend!
Salud!!

Tuesday, May 24, 2016

Super Quick Fix - Shrimp Over Polenta

Hey ya'll! Sorry I'm a day late with my weekly post but had to get a few things in order to close out the semester and prepare for my adventure over Memorial Day weekend (tell you all about it next time).

So when I say this is a quick fix, I mean seriously quick. And easy! It's basically a quick version of shrimp and grits (swapping the grits for polenta)

Ingredients

1lb - 1.5lbs of peeled and deveined uncooked medium sized shrimp (I like to take the tails off before cooking)
1 roll/tube of polenta (if you prefer to make the slow cooked kind follow the package directions).
1 can of low-sodium tomatoes cooked in olive oil and garlic (if you can't find this, you can also dice and sautée two tomatoes in olive oil and garlic with just a little sea salt for 2-3 minutes)

Directions

Wash and prepare your shrimp. Set aside.

Place your tomatoes in a skillet (if using a can) and heat for roughly 1 minute. If you are preparing fresh tomatoes make sure you are using a skillet large enough to add your shrimp directly to it.

Cut half of your polenta into 1/2" slices. In another skillet heat 1-2 tablespoons of olive oil. Place your slices of polenta in this heated pan, and brown the polenta for 5 minutes on each side.

When your polenta is just about done, add your shrimp to your tomatoes on medium heat. Shrimp cooks very quickly so it will only take a minute or two. You want to make sure the shrimp is no longer translucent. Stir and mix well. Once all your shrimp is cooked turn off the heat to that skillet.

Plate your food by putting the polenta on the plate first and then the tomatoes and shrimp on top.

And you're done! And you didn't have wait for brunch at an overpriced restaurant to get your shrimp and grits fix. You should have enough shrimp and tomatoes for a second serving. That's when you can cut and prepare the other half of the polenta.

Alright lovelies! I gotta run! See you next week!

Salud!

Monday, May 16, 2016

Monday's Meal - Fish Packets

I absolutely love fish packets! I admittedly didn't enjoy cooking fish other than salmon prior to discovering this method. It is such a simple technique and you can experiment with different spices. What I have included below is my favorite recipe. The fish comes out very tender and full of flavor. You can also cook this on the grill.

2 - 4 rainbow trout fillets, halibut, sole, or your favorite fish
Slices our favorite/preferred small potato such as red or fingerling (3 - 4 sliced potatoes)
1 red pepper cut into strips (4 -5 strips per piece of fish) optional
1 medium shallot, petite diced (roughly 1 teaspoon per piece of fish)
1 tablespoon olive oil or ghee (per piece of fish)
1 teaspoon minced garlic (per piece of fish)
1 teaspoon ground black pepper (per piece of fish)

Preheat oven to 400 degrees F (200 degrees C). Rinse fish, and pat dry.
Rub fillets with olive oil (ghee), and season with minced garlic, salt, and black pepper. Tear a piece of foil for each piece of fish, about twice the size of the piece of fish. Place each fillet on top of the potatoes, shallots, and red peppers. Carefully seal all edges of each piece of foil to form enclosed packets. Place packets on foil lined baking sheet.
Bake in preheated oven for 15 to 20 minutes, depending on the size of fish. Fish is done when it flakes easily with a fork.

Since I don't have a microwave I reheat the fish in the oven. It also heats up well in the microwave.

Let me know how it turns out!
Salud!

Monday, May 9, 2016

Jerk (or Curry) Veggies!

Guess who's back?!?!  I missed ya'll!!! I really did!!!

Where have I been? Where did I go? What happened?? Life happened :)
That's the past and we're now moving forward!
And I never stopped cooking ;)

So, I have set a new goal for myself, to blog on Mondays! Which works because I normally cook on Sundays and/or Mondays. And now that the Blogger app is working again (yea that was an issue) I can carve out the time for myself. There will be a new post every Monday!!!!!

Here we go!

Per several Facebook requests, here is my jerk(curry) veggie recipe. I put curry in parentheses because you can make the same recipe with either and it turns out yummy.
   
Ingredients
1 medium onion
2 tbsp coconut oil
1 1/2 tbsp ginger, minced (can also use the ginger in the tube, add another 1/2 tbsp)
1 tsp coriander
3 tbsp jerk seasoning (you can use curry instead)
4 thyme sprigs
1 can chopped tomatoes (look for low-sodium)
3 tbsp honey
2 low-sodium vegetable stock cubes, crumbled (I have used one before and it turned out well)
4 medium sized sweet potato, peeled and cut into chunks
2 cans black beans, rinsed and drained
1/2 red pepper, roughly chopped

Before you dive in, let's chat a little about the sweet potatoes. You can take one of three approaches:

1. Roast them in the oven so that they get tender. - If you want a precise way to handle things then I recommend this version. Preheat oven to 425 degrees. Peel and cut up the sweet potatoes into cubes. Toss the cubed sweet potatoes with coconut oil. Line a baking sheet with foil and spread the sweet potatoes out evenly. Roast sweet potatoes in the preheated oven, turning occasionally, until the vegetables are soft and golden brown, 30 to 35 minutes. Now your sweet potatoes are ready!
2. Boil them whole, let them cool, peel, and then cube them. This is the method I use. - Fill the pot about half full (you will need just enough water to cover the sweet potatoes). Bring to a boil. Add sweet potatoes. Cover the pan and cook sweet potatoes for 10 to 12 minutes or until just tender on the outside but resistant in the center when pierced with a knife. You do not want to cook them all the way through as if you are making a pie because they will get mushy when you peel and cut them. I don't recommend you peel and cube them, and then boil them because they will get soft very quickly.

3. Cook them as the other ingredients cook. - You can peel and cube the sweet potatoes and add them after you saute the diced onion. The catch is, you will have to wait for them to cook to your preference. So choose your method wisely.

Directions:
In a dutch oven or medium sized pot, heat the coconut oil. Add the roughly chopped onion, ginger, coriander, and jerk (or curry) seasoning. Mix these ingredients together well. Stir in the thyme, chopped tomatoes, honey and stock cubes with 600ml water and bring to a simmer. Simmer for 10 mins. Stir in the beans, peppers and some seasoning, and simmer for another 5 mins. Lastly add the cooked sweet potatoes. 

If you choose to cook the sweet potatoes using method 3 noted above (after you add the chopped onion, ginger, coriander, and jerk (or curry) seasoning) - Stir in the thyme, chopped tomatoes, honey and stock cubes with 600ml water and bring to a simmer. Simmer for 10 mins, then drop in the sweet potatoes and simmer for 10 mins more. Stir in the beans, peppers and some seasoning, and simmer for another 5 mins until the potatoes are almost tender. 

Sorry if this seems a little complicated but I wanted to give you the big picture. And some options on how you prepare things. I have added a little more honey to taste. And this dish pairs WELL with fish and chicken. It's become one of my favorite dishes :)

Okay, let me know if you make it and how it turns out!!

And look out for another post on Monday May 16th!!!!!

Salud!!!


Sunday, November 9, 2014

I'm BACK and Here's Some Info on Traveling with Advanced Prep Meal

It has been MONTHS! I know, I know and I missed you all!! I really did. I kept saying, oh that should go on my blog or oooo I should write about that. But alas, time got away from me. But I can tell you what I've been up to :)

1. Landed my dream job!! And let me tell you, it's exactly what I want to do. Day-in and day-out I get to do work that is rewarding and fulfilling. Not to mention I am finally getting back to a normal workout routine, including yoga that's offered through my office.

2. Started my nutrition certificate program. One of the most interesting things we are doing is tracking and analyzing our diets. I'm learning a lot so be prepared for more information!!

3. I have started writing a cookbook. It will have a very unique twist :)

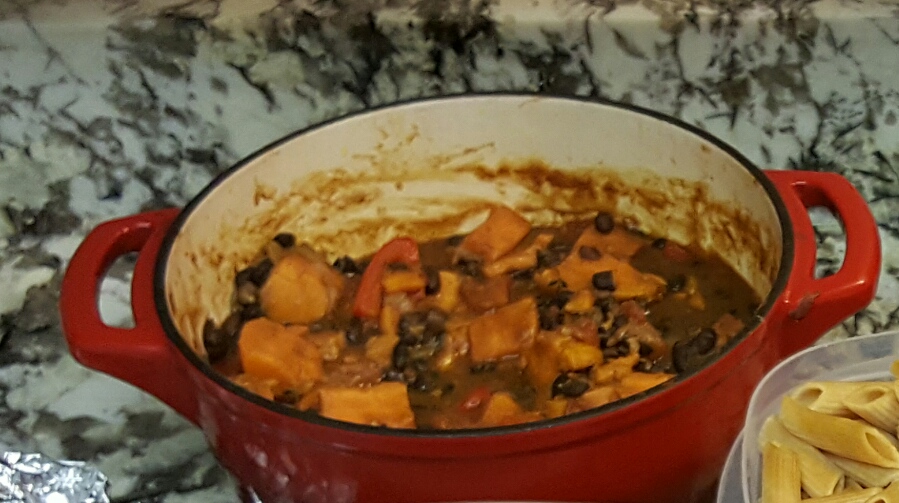
4. And don't think for one minute I haven't been cooking. Here's just a little visual taste:


And now for the meat of this post. I noticed a fellow alum of my high school was not only preparing her meals in advance, but she was traveling with the food she prepared. She is also one of the few people I know that has prepared for and competed in a figure competition. I definitely wanted to share what she shared with me.

My questions for her were:

1. How long has you been preparing your food for your trips?
2. How do you prepare the food for traveling (e.g. do you freeze it, use special containers)?
3. What do we need to know about getting food through airport security?
4. How has this been beneficial to you?
5. Do you any tips for anyone that wants to start traveling with their food?

And here are her answers as she was traveling to a conference:

1. I always travel with adequate snacks and breakfast, such as oatmeal packets, apples, and protein bars. I hate that starving feeling and having to eat an unfulfilling bag of chips or candy bar. I like to save those treats for when I actually just want to snack on something salty or sugary, as oppose to when my body is craving protein. 2. I purchased a Six Pack Fitness bag for $69.99 that I use every day. It is completely insulated and has kept my food chilled for over 24 hours before (when opened minimally). It comes with 2 gel packets, that you freeze and store inside. When traveling through an airport, the gel freezer packs must be completely frozen, otherwise they are considered a liquid or gel and will get thrown away at the security checkpoint.      *  I eat 6 meals a day. But I also count 1 oz of almonds and a protein shake as a meal. So it’s all relative to your particular diet and definition of a meal.      *  I did not have to freeze any of my meals. The reason for this is that I usually call head and ask the hotel for a microwave and mini refrigerator, if they do not already provide those items in the room. The most I have ever been charged is $30 for both, for my entire stay. Which isn't bad when you consider the money you save on eating breakfast in your room, as opposed to out every single day. Most times, the hotel does not charge for either item.      *  It’s difficult to explain how I pack my Six Pack Bag, unless you have one. But just know that I stuff it to the max and use mostly ziplock bags (not eco friendly but I only use them when I travel). I chill everything the day before, so that it is already cold before packing it into the cooler/bag. 3. As far as the airport security, just know that everything must be a solid or frozen. No creams, sauces, gels, or liquids. If it’s questionable, freeze it. Just make sure you leave enough food thawed to eat when you arrive. 4. Packing my food for travel is beneficial in many ways. As I am preparing for my bodybuilding competition, it allows me to stay on my diet, without spending a ton of money on food. When I am not preparing for a competition, it allows me to eat well in the airport, while also eating healthy and saving money. When I travel for leisure, I like to eat the local food. But I almost always pack oatmeal, fruits, and protein bars… because I am a snacker. 5. My biggest tip for someone that wants to begin traveling with their meals are below.      *  Cook your meals the day before and make sure they are chilled or frozen. But remember to have your first day's worth of food thawed, so you can eat while traveling and upon arrival.      *  Make sure to account for your food bag/cooler (I would suggest Six Pack Fitness bag)as a carry on. When possible, only take fruits, packets of oatmeal, and other packaged items that can be thrown into a normal carry-on luggage with other items.      *  No liquids or gels, this includes sauces, chowders, thick condiments and anything else that has a gel or liquid consistency. These items will get thrown away at the airport security checkpoint.      *  If you are dieting for something in particular, then you probably need to pack every meal. But if not, enjoy the local food and culture. Pack the foods that are necessary for financial reasons, or the easiest to travel with like breakfast and snacks. But try to enjoy at least one local meal a day. Food is such a big part of experiencing life and the beautiful people who influence it. Carpe diem.
And there you have it!
Look for some holiday recipes from me very very soon!
Salud lovelies!

Wednesday, June 11, 2014

Cooking After Work

Hey lovelies!! It has been a minute but I am hanging in there! My second half-marathon went well and I ended up raising over $3,400.00!! I will admit, fund raising is a little intimidating for me, but I exceeded the required goal and I know the funds are going to a cause that is near and dear to me.

On to the purpose of this post! I have a friend from college (Shelly) that has a page on Facebook called Cooking After Work. Every time she posts something I sit back and admire the dish. But the main thing that I admire about this classmate is that she was a working professional mom!! I decided it was time to interview her for the blog. 

SSD: Tell me about the purpose and inspiration for your page Cooking After Work.

SSC: I had graduated law school, started my first career job (I’d been working since elementary school J), purchased my first home with my then fiancé, was about to get married and realized…WAIT A MINUTE, I CAN’T COOK….LIKE REALLY COOK…EGGS AND PASTA DON’T COUNT!  Then, I thought to myself, “I wonder how many other young professionals are in the same boat as me?”  That boat being one where you had spent your life through that point focusing primarily on school and work and did not carve out time to learn how to cook.  I then did some self-reflection and realized that school and work had been my life through that point.  I was fortunate enough to be able to live at home through my time in law school and my first year of work.  As the last child of 6, my family allotted me the much appreciated luxury of focusing on my education and career.  But now, things were getting real.  I was about to start my own family.  My two young nephews would be moving in with me before I even had my own children and I needed to be able to feed them, right?!  At least these were all of my thoughts.  I also thought about all of my friends from elementary, middle, high, college and law schools.  I figured that many of them had to have been in the same boat as me.  Right?  Right?  No, OKAY!  However, I didn’t know how many of them would be willing to admit it.  To admit that you couldn’t cook as a young woman seemed to be such a faux pas at the time.  I’ve found that some would even frown on using recipes.  That’s when I decided that I’d start Cooking After Work.  This would be a way for me to share my experience learning how to cook and also to help inspire others to come out from behind shadows and the shame (okay, I’m being dramatic…or am I?) and get into the kitchen and learn how to cook.  I figured I could teach others from my mistakes and successes and learn from others as well.  Cooking After Work got its name because I thought of cooking as something I did after work, naturally.  Cooking After Work became a place for men and women, alike, to get together and share their dishes, ideas and support for each other in their individual cooking escapades across the World (well, the US and Caribbean, that I know of). 
SSD: How do you balance cooking with working and having a family? Any tips to maintain that balance?

SSC: It’s not easy but it’s possible….WITH HELP!  The key is to get lots of help.  I now have a 3 ½ year old son so my time is even more limited than when I started Cooking After Work.  However, with the help of my husband and extended family members, I am able to still get my cooking fix in.  Spouses, grandparents, neighbors, and friends are the perfect individuals to look to in keeping any little ones occupied while cooking.  If you have the time, include the little ones in your cooking projects.  Even if those dishes don’t come out as planned, the fun that you’ll have preparing them will make up for any failures in the taste and looks department….I promise!
Utilize your weekends, they’re your friend.  You won’t feel as rushed as you do in the week.  Prep meals for several days or the entire week if you can (I currently/generally only cook 2-3 times/week).  Also, some weeks you just won’t feel like cooking.  Those weeks are known as “every man for himself” in my household.  Those weeks are fine too.  Cooking does not have to turn into a chore.  With supportive family you’ll be able to slack off a week or two or more with no pressure---I think I slacked for the majority of my pregnancy as the smell of food didn’t appeal to me for months!  Getting the other adults in your household to cook also takes the stress out of HAVING to cook.  This way when you choose to cook, it’s a more pleasurable experience. 
One practical tip, go food shopping on one day, organize and freeze, and then do your cooking on another.  It makes things much more manageable.  If you have excess, portion out and freeze before folks start diving into the dish, this way you will have a home cooked meal for those “every man for himself” days!  
SSD: I noticed that you make a lot of different types of foods/cuisines. Where do you get your inspiration for you meals?

SSC: I get my inspiration in a myriad places.  I’ve gotten great inspiration from my Afterworkers.  For example, one of our members, Rachel, shared a short rib lasagna roll recipe one year and I decided to try it one holiday.  My husband fell in love with the dish and I make it every now and then for him (more then than now due to all the work it entails!).  I get inspiration in the lunchroom at work.  I get inspiration from the food network (the Pioneer Woman is my recent favorite…I think our styles in cooking are pretty similar).  I also get inspiration from food magazines that friends have been kind enough to gift me.  I get inspiration from my family members who will request dishes at times.  I love trying different cuisines!  While I have a few staples that get rotated on a monthly basis, i.e. Pelau dish discussed below, I definitely like trying new foods/cuisines to broaden my cooking and EATING horizon.

SSD: Are you multi-tasking while you are preparing your food? (i.e. watching TV, listening to music, talking on the phone)

SSC: I actually don’t multi-task much while cooking.  Cooking has become my relaxation go to method.  When I am stressed or overwhelmed with any part of life, you will usually find me in the kitchen cooking or baking.  I like to do it in virtual silence when stressed.  I’ve found that it really calms me down and puts me in a better frame of mind in which to come up with a solution to whatever issue I’m facing.  Cooking has in essence become my ME time.  It’s a time when I can be one with my thoughts and I relish the moments I can get alone. 

When I am in a relatively relaxed mood, I may have the TV going but I am usually busing looking at a cookbook or a recipe on my phone so I don’t pay the TV much attention.  On those relaxing cooking days, my son is usually in the kitchen “helping” me out.  I cherish these experiences as I’m able to get in some bonding time with him and some pretty “interesting” photo ops.
SSD: Did you grow up cooking or did you start when you had a family?

SSC: As discussed above, I definitely started when I had a family.  I knew how to make breakfast foods and a few other minor dishes but I didn’t fully delve into cooking until I started my family.
SSD: What is your favorite item to prepare?

SSC: Just one?!  Really?  I love preparing a dish called Pelau.  Primarily because of the nostalgic feel I get each time I make it and I make it often.  I was born in St. Vincent and the Grenadines and it’s one of the dishes that we made often growing up in St. Vincent and then later in Brooklyn once we immigrated to the US.  It’s essentially rice, peas, and chicken all in one pot (think arroz con pollo but the rice is not yellow…it’s actually more so brown bc of the “burnt” sugar you start the dish with).  When I first learned to make the dish I had to use a recipe.  It also took some time learning how to “burn” the sugar so that it didn’t really burn and give the dish a bitter taste.  Man, did it take some time!  Now, I no longer use a recipe.  I can make it in my sleep.  But I am still trying to find ways to perfect it.  My sister is the master pelau maker in our family and I am always looking over her shoulder to learn her secret Jedi pelau tricks.  She swears she doesn’t have any but I know every time I blink she throws in a secret ingredient or two!

SSD: Do you have any tips for anyone that wants to start cooking more?
SSC: There is no shame.  Just get into the kitchen and try!  You will fail.  So what?!  We all fail! (I’ve tossed out a few pots of failed dishes early on…I’ve since learned to control that urge J)  Recipes are your friend but practice is your BEST FRIEND.  Keep trying and you’ll eventually have your signature dish or two or three.


Thank you Shelly for ALL this great insight!! SALUD!!!!